




For buyers who have never ordered custom packaging before, the process can feel like a black box. You share a product, wait, and eventually receive the packaging. Knowing what happens in between makes it easier to plan, set realistic deadlines, and avoid delays caused by missing information or late approvals.
The custom packaging development process follows a fairly consistent path, whether the project is a new corrugated shipper, a foam insert, or a printed retail carton. This guide walks through each stage, what to prepare, and where timelines tend to stretch.
Initial Inquiry and Information Gathering
Every project starts with information. The more complete it is at the start, the faster the project moves. Useful details include:
- Product details: Dimensions, weight, fragility, and any surfaces that need protection.
- Quantities: Estimated order size and annual usage, which affect material choices and pricing.
- Shipping method: Parcel, LTL, full truckload, or export, plus storage requirements.
- Branding needs: Logos, colors, handling instructions, and regulatory markings.
- Current challenges: Damage claims, slow packing, high freight costs, or poor shelf presentation.
- Deadline: When the packaging needs to be at your dock.
Volume forecasts deserve extra attention, especially if the packaging will support a seasonal peak. Our Thanksgiving Week Packaging Checklist for Warehouses and Fulfillment Teams shows how peak forecasts translate into packaging quantities.
Consultation to Confirm Specifications, Materials, and Print
Next, your supplier reviews the information and talks through options. This is where you make technical choices in plain language: board grade and flute for corrugated, foam type and density, film thickness for poly, and print method and color count.
Consultation is also the stage to discuss trade-offs. A lighter material may reduce cost but needs testing. Full-color print looks great but costs more than one or two spot colors. Overseas sourcing may lower the unit price at high volumes but adds lead time. A good supplier lays out these options clearly so you can choose what fits your priorities.
If you do not know the right terminology, that is fine. Describing how the product is used and shipped is usually enough for an experienced packaging design company to recommend the right specifications.
Design Concepts and Prototypes
With specifications confirmed, the design team develops concepts. For structural packaging, this includes dielines, which are flat layouts showing cut and fold lines. For printed packaging, it includes artwork placement on the dieline.
The packaging prototype is where the design becomes something you can hold. A prototype is a physical sample built to the proposed specifications, so your team can check fit, closure, insert placement, and overall appearance before committing to production.
Prototypes are one of the most valuable steps in the process. They catch issues that drawings miss: a product that fits but is hard to remove, an insert that slows packing, or a box that works on its own but stacks poorly on a pallet. At Classic Packaging Corp, we provide prototypes for approval so customers can review the solution before production.
Sample Testing With Real Product and Real Packing Conditions
A packaging prototype is most useful when tested as it will be used. That means:
- Pack with real product: Not a substitute item or a size estimate.
- Using your actual packing line: Have the people who will pack the product try the prototype at their stations.
- Simulate transit: Run drop tests, stacking tests, and test shipments to customers or between facilities.
- Checking storage: Confirm the packaging fits your racking, pallet patterns, and available floor space.
Testing feedback often leads to small adjustments, such as a slightly different insert cut or a stronger board grade on one panel. Making those changes now costs far less than correcting them after a full production run.
Quote, Proof, and Final Approval
Once you confirm the design, you receive a final quote based on approved specifications and quantities. If the packaging is printed, you also review a proof showing artwork, colors, and placement.
Review proofs carefully. Check spelling, logo placement, barcodes, color references, and regulatory text. Once approved, the proof becomes the production standard, so changes after this point can add time and cost. Final approval locks the specifications and moves the project into the production schedule.
Production Scheduling and Lead Time Factors
Custom packaging lead time depends on several factors:
- Format and complexity: A resized plain corrugated box moves faster than a multi-piece printed gift box with inserts.
- Print requirements: More colors, special finishes, and new printing plates add time.
- Tooling: New cutting dies or molds need to be made before production starts.
- Order volume: Larger runs take longer to produce and may be scheduled in stages.
- Sourcing location: Domestic production generally has shorter transit times. Overseas production may offer cost advantages on large volumes but includes ocean freight and customs clearance.
- Season: Demand rises before major retail periods, so production slots fill faster in late summer and fall.
The most reliable way to manage custom packaging lead time is to share your deadline at the inquiry stage and keep approvals moving promptly. Delayed feedback on prototypes or proofs is one of the most common causes of missed dates.
Delivery, Receiving, and Reorder Planning
When production is complete, the order ships to your facility. Coordinate delivery timing with your receiving team, confirm dock hours, and ensure space to store the new inventory. Classic Packaging Corp. offers delivery and pickup in the Chicagoland area and nationwide delivery across the United States, with service to customers in Canada.
The project does not end at delivery. We keep approved specifications, artwork, and tooling on file so reorders match the original run. To avoid stockouts, set a reorder point based on usage and lead time, and share updated forecasts with your supplier, especially ahead of seasonal peaks. With specs already approved, reorders typically move faster than the first order.
Conclusion
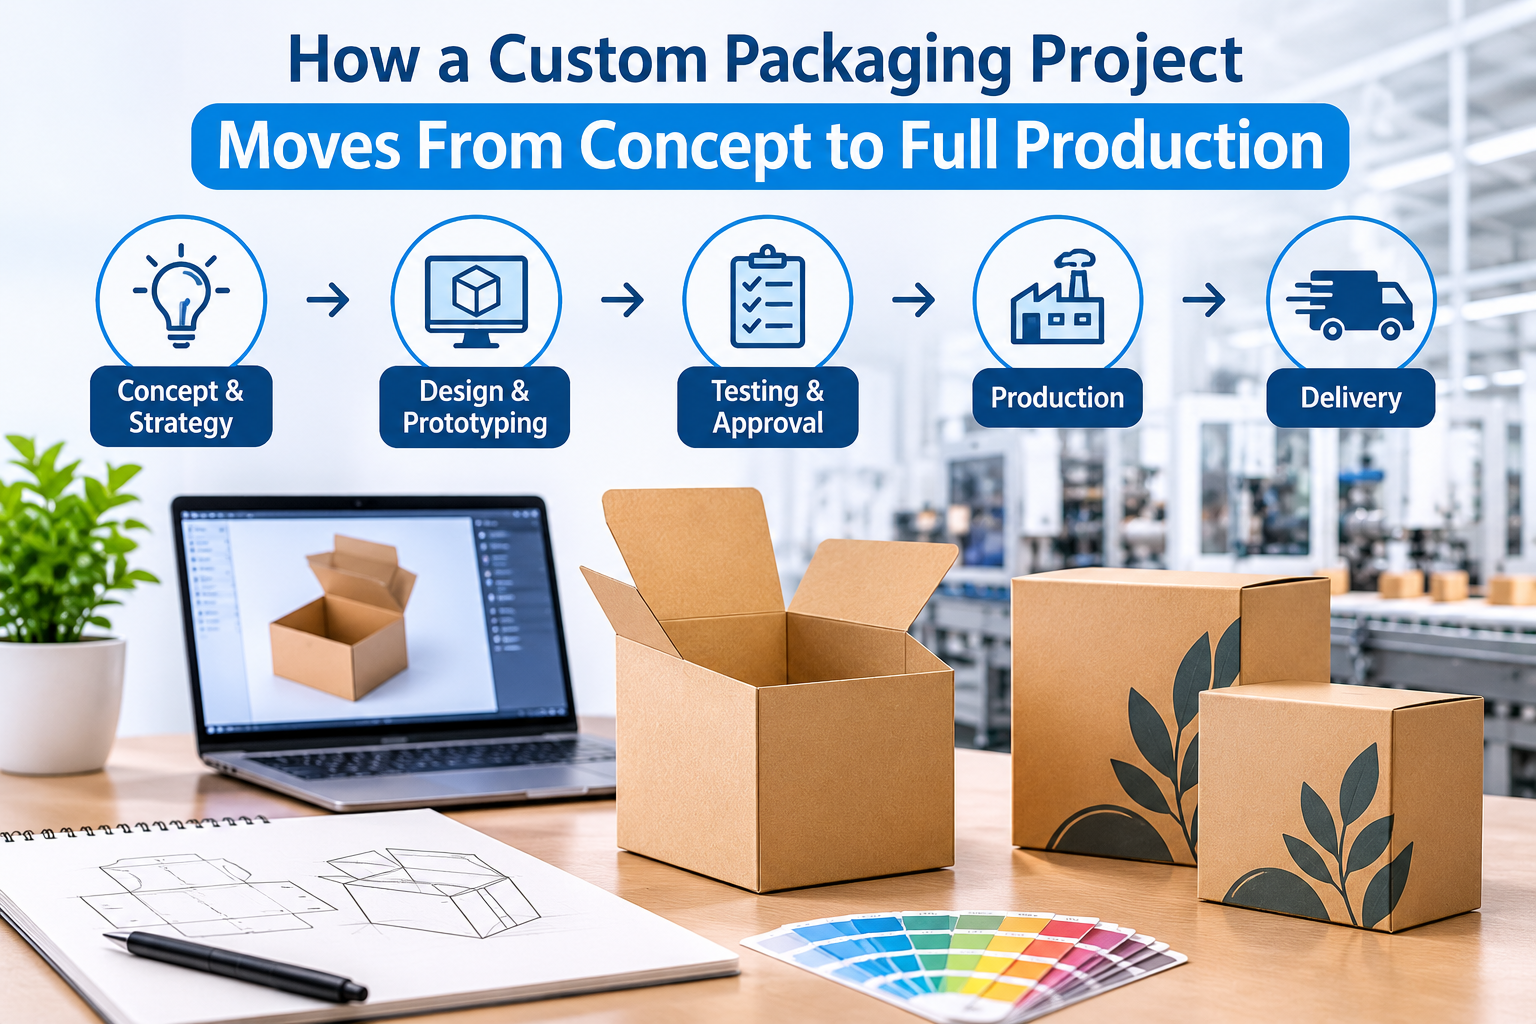
The custom packaging development process moves from inquiry and consultation to design, packaging prototype testing, approval, production, and delivery. Each step builds on the last, and clear information and timely approvals keep the project on schedule.
To understand how this process fits into a full packaging program, read our guide to Custom Packaging Solutions for B2B Operations. Ready to start a project? Visit our Request a Quote page, and the Classic Packaging Corp. team will help you take it from concept to production.
People Also Ask
What are the steps in the custom packaging development process?
The custom packaging development process typically includes inquiry, consultation, design concepts, prototyping, sample testing, quote and proof approval, production, delivery, and reorder planning.
What is a packaging prototype?
A packaging prototype is a physical sample built to proposed specifications so you can test fit, protection, packing speed, and appearance with the real product before approving production.
How long is the custom packaging lead time?
Custom packaging lead time varies by format, print complexity, tooling, order volume, season, and whether you source packaging domestically or overseas. Sharing your deadline early helps your supplier plan a realistic schedule.
What information do I need to start a custom packaging project?
Have product dimensions and weight, estimated quantities, shipping method, branding requirements, current packaging issues, and your target delivery date. Product samples are helpful for prototyping.
Are reorders faster than the first custom packaging order?
Usually, yes. Once we approve and file the specifications, artwork, and tooling, reorders skip the design and prototype stages and go straight to production.