






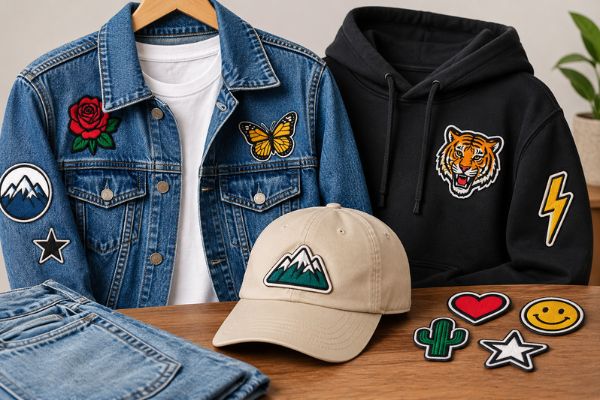
A plain denim jacket or a grey hoodie does its job, but it rarely gets a second look. Buying something new every time you want a different style gets expensive quickly, and the clothes you already own often need only one small change.
A patch is one of the cheapest ways to make that change. A single design on a sleeve, a cap or the back of a jacket can give a garment its own character. This guide shows how to choose and wear patches so the result looks planned and never crowded.
What Custom Patches Are and Why They Work
Custom patches are pieces of fabric or other material made to your own design, shape and size. They are usually embroidered, woven, printed or made from PVC or leather, and they attach with an iron-on, sew-on or adhesive backing.
They work for styling because they add detail without changing the garment. A single patch gives a plain jacket, hoodie or cap a clear focal point, and you decide how bold or quiet it looks.
A few things make them easy to use:
- They suit fabrics you already own, such as denim, cotton, canvas and fleece.
- Backings that need no sewing make them simple to apply at home.
- One patch can cover a small mark or worn spot on a sleeve or pocket.
Small changes like these are why custom patches suit almost any wardrobe. They let you update clothes you already like instead of replacing them.
Choose the Patch Type That Suits the Garment
Each material behaves differently once it is on a real garment so it helps to pick the patch with the clothing in mind.
Embroidered
A cap front takes an embroidered patch well because the raised stitching keeps its outline even when the fabric curves. A large one on a jacket back also works, but it adds some weight to the garment.
Woven
Small lettering is where woven patches earn their place. A name on a work shirt pocket stays sharp because the thread is thin enough to keep the letters apart. They also sit flatter than embroidered ones which keeps a plain tee light.
PVC
PVC does not soak up water, so it holds up on a school bag or a rain jacket. It stays stiff though, so it looks out of place on soft knitwear.
Leather
Leather patches usually carry one simple stamped mark. Stitched onto a canvas tote or a denim waistband, they darken a little with use.
Backing
Custom iron on patches are the easiest to apply on cotton hoodies and jeans, since they need only an iron and a pressing cloth. On thicker fabric, a few stitches around the border stop the edges from lifting.
Patches Look Balanced With One Main Spot
A jacket looks balanced when one patch leads and the others stay small. On denim that is usually a large patch across the upper back, with a few custom patches on a pocket or sleeve for extra detail. Putting patches everywhere makes the garment look busy since no single one stands out.
It also helps to hold the patches against the garment before attaching them. A sleeve patch that looks fine on a table can sit too low once the arm bends, so checking it while wearing the garment avoids that.
| Placement | Garment | Look it gives |
| Left chest | Shirts, hoodies | Neat and understated |
| Pocket or collar | Denim, work shirts | Small, easy detail |
| Upper sleeve | Jackets, hoodies | Interest without taking over |
| Jacket back | Denim, bomber jackets | The main feature |
| Cap front | Baseball caps | One clear focal point |
Match Colours Sizes and Designs
Patches in four unrelated colour schemes can make a jacket look like a pile of leftovers. Repeating one or two colours already in the garment, such as the blue of the denim or the white of a cap logo, ties them together.
Plain clothing gives a bright patch room to stand out. A charcoal hoodie with one orange patch on the sleeve draws the eye straight to it, since nothing else on the garment is competing.
Size works the same way. One large patch with two or three small ones nearby gives the eye a place to start. Leaving a bare stretch of fabric around them also makes the arrangement look deliberate. If you are unsure, fewer patches usually look cleaner than more.
Metal Band Patches Suit Denim and Jackets
A band jacket is one of the most recognisable ways to wear patches. It takes a simple piece of clothing and turns it into something that shows the music you listen to. The fabric and the layout decide whether it looks planned or messy.
Thick Fabric Holds Them Best
Metal band patches look best on fabric that can carry their weight. A sleeveless denim vest is the classic base and a jean jacket or black hoodie works too. The back panel usually holds the biggest patch, while smaller ones go across the front and down the sleeves.
Dark Colours Keep Them Readable
Black, white and muted greys keep the artwork clear, and denim blue sits well behind all three. Patches from the same style of music also look more like a collection than a random mix, so a consistent dark theme reads as deliberate.
Gigs and Casual Wear Both Work
Plenty of people wear a jacket like this to gigs or festivals, and it also suits everyday wear with jeans and boots. Over time it gets worn in and picks up new patches, which is part of the appeal. Custom designs can carry your own artwork or a local band’s logo, as long as you have permission to use it.
Apply Iron On Patches in Five Steps
Custom iron on patches stay neat when the placement is settled first and the heat is even. These five steps cover what affects how the finished garment looks.
-
Test the Placement
Pin the patch where you want it and look in a mirror with the garment on. Moving it now is easier than lifting it later.
-
Prepare the Garment
Iron the fabric flat. No creases should end up trapped under the patch.
-
Press the Patch
Lay a thin cotton cloth over it and press firmly for the time the supplier suggests.
-
Press From the Inside
Turn the garment over and press the back of the same spot. This helps the adhesive grip the fibres.
-
Let It Cool and Check the Edges
Wait until the fabric has cooled and then lift a corner gently. A few stitches around the border help on jackets and bags that see heavy wear. Delicate fabrics may suit sew-on instead.
Questions People Ask Before Using Patches
How do you attach patches to clothing?
Iron-on works for cotton, denim and other fabrics that handle heat. Sewing suits leather, silk and anything that could scorch. A few stitches around the border also help on jackets and bags that get heavy wear.
Can you add patches to a plain t-shirt?
Yes. Tees stretch, so a patch can pull the fabric out of shape over time. A small patch on the chest or sleeve sits better than a large one, and a piece of backing fabric inside the shirt gives it some support.
What glue works for attaching patches?
A washable fabric glue is the usual choice when you don’t want to iron or sew. Let it dry fully before the first wash. Super glue and hot glue can crack or stain the fabric, so they are best avoided.
Can you design a patch online for free?
Many online patch makers let you build a mockup for free, so you can try shapes and colours first. Paying starts when you order the physical patches, and a simple design with clear lettering usually turns out best.
How can you make patches for clothing at home?
You can paint or draw a design on sturdy fabric, back it with fusible web and cut it to shape. Hand embroidery gives a more textured result, though it takes longer and suits smaller designs.
Start With One Patch
A good place to begin is one patch on one garment. Choose the jacket or hoodie you reach for most, and a design that sits close to your own taste, such as a small symbol, your initials or a band you have followed for years.
Living with it for a week shows you whether it needs company. Some jackets end up with a single patch for good, while others pick up a second one a few months later. Either way, the garment starts to look like yours.